Cccam Ipk Open Atv Images
Setup guide for Open ATV, cable setup. All the information you require should be in the guide if there's anything your unsure about, post in the thread below and someone will kindly answer. Whilst setting up, if it’s mentioned to reboot/restart your receiver then do this by using your remote, press and hold the power button down for 3 seconds when you see a list choose option restart. Setting up your receiver Set up your receiver and plug in your cable TV feed into RF in (you may need a F-plug connector) Loop through to additional tuners if you have a multi tuner receiver.
Firmware Search the internet for Open ATV 6 and find the most recent OpenATV firmware for your receiver. Click on *your receiver* Click on OpenATV Download the zip file of the latest nightly build.
Falkovideo part 3 trailer. Full version of Falkovideo 4 - 1 Girl and 3 Women It is nearly impossible to find this video, if you search the darknet for days/weeks you will always end up with the trailer. Lucky for you, here can get the most wanted video - falko part 4.
Extract the zip. Inside this zip file will be a folder called *receiver name*. This folder needs transferring to a freshly formatted USB stick smaller than 32 GB and fat 32 Flashing the new firmware ** If reflashing over a prevoius image Make sure you have backed up any prepaid lines before continuing. ** Copy the *receiver name* folder onto the USB stick. You are copying the *receiver name* folder, not the contents of the *receiver name* folder.
On your USB stick you should then just have 1 folder called *receiver name*. Make sure the receiver is turned off (on/off button at rear) and place the USB stick in a USB port of the receiver. Turn on the receiver. The display will initially show boot, followed by USB if done correctly.
Changelog network fixes enigma2-softcams-cccam-all-images_2.3.2-r1_arm-mips_all.ipk works on all images, for arm and mips receivers. Dear visitor, welcome! Create an account or sign in to comment. Setup guide for Open ATV, cable setup. If reflashing over a prevoius image Make sure you have backed up any prepaid lines before.
Press the standby button on your receiver while it says USB. The display will now change to FLSH, as your new image is being flashed to your box.
(different models of receiver require you to carry out this process slightly different but there is always a message on screen to guide you) Flashing will take about 5 minutes Once your receiver has finished flashing, it will reboot. Let the receiver boot up fully then power back down and take out the USB stick out and replace with a new one or format that stick and place back into the receiver. Now power back on the receiver.
Setting up your new image On first load choose HDMI, 1080i, 50Hz Language English, Click yes to delete other languages. Now the start wizard will guide you through, press OK, use the wizard. To set tuner A press OK (dont change any settings) Do the same on any other tuners or disable them if not needed.
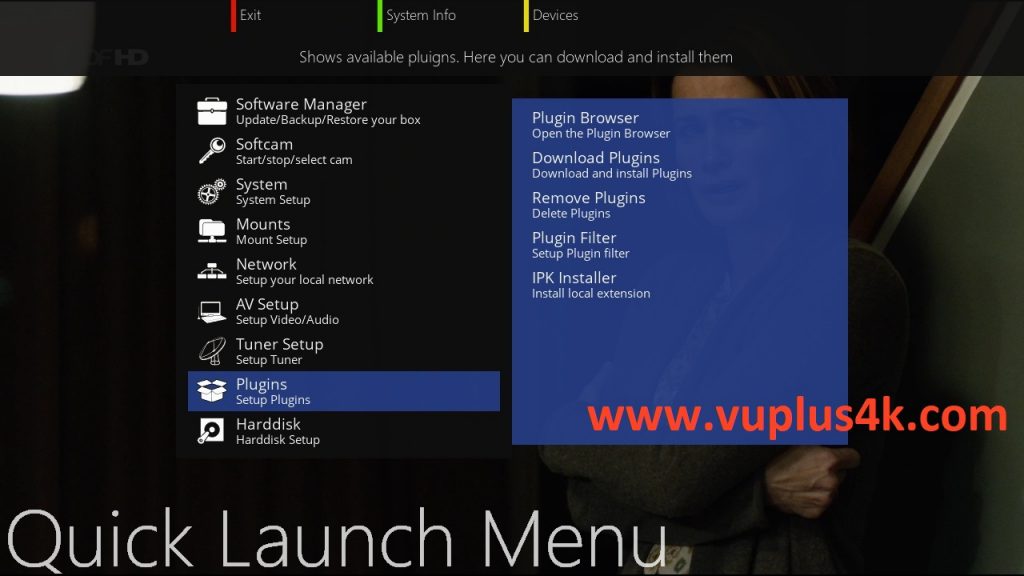
Then click No to a service scan. Then press OK a couple of times to finish the wizard. Do not use the scan feature as we are going to use Auto Bouquets Maker instead Exit all screens and go to plugins, green button to download, go to system plugins and find autobouquetsmaker, press OK to download, exit screens and reboot receiver. Setting up USB / for use with your box You will need a USB stick or for certain functions of your receiver. Initialise your USB/HDD Plug in your UBS/HDD device that you are going to be using as your storage media into the rear of your box (you should of already done this) Menu setup System Storage Devices Initialisation choose your USB/HDD that shows up Once initialised convert the file format to ext4. Menu>setup>system>storage devices>Convert ext3 filesytsem to ext4 Please note though that ext4 will make your device unreadable on a windows computer Scanning for Channels with Auto Bouquets Maker.